First of all I must apologise for not posting these instructions yesterday, as I said I would.
I do hope that you will forgive me, and still have a go at making the template and having a go at designing your own card using it.
Here we go then!
You need a piece of Window Sheet or a piece of a sheet of acetate- I used an A6 piece for mine
(approximately) and a Stampin' Up! Triangular punch (Item number133375 £14.25)
For these photos I have used White card on a black background so that you can see what's been done.
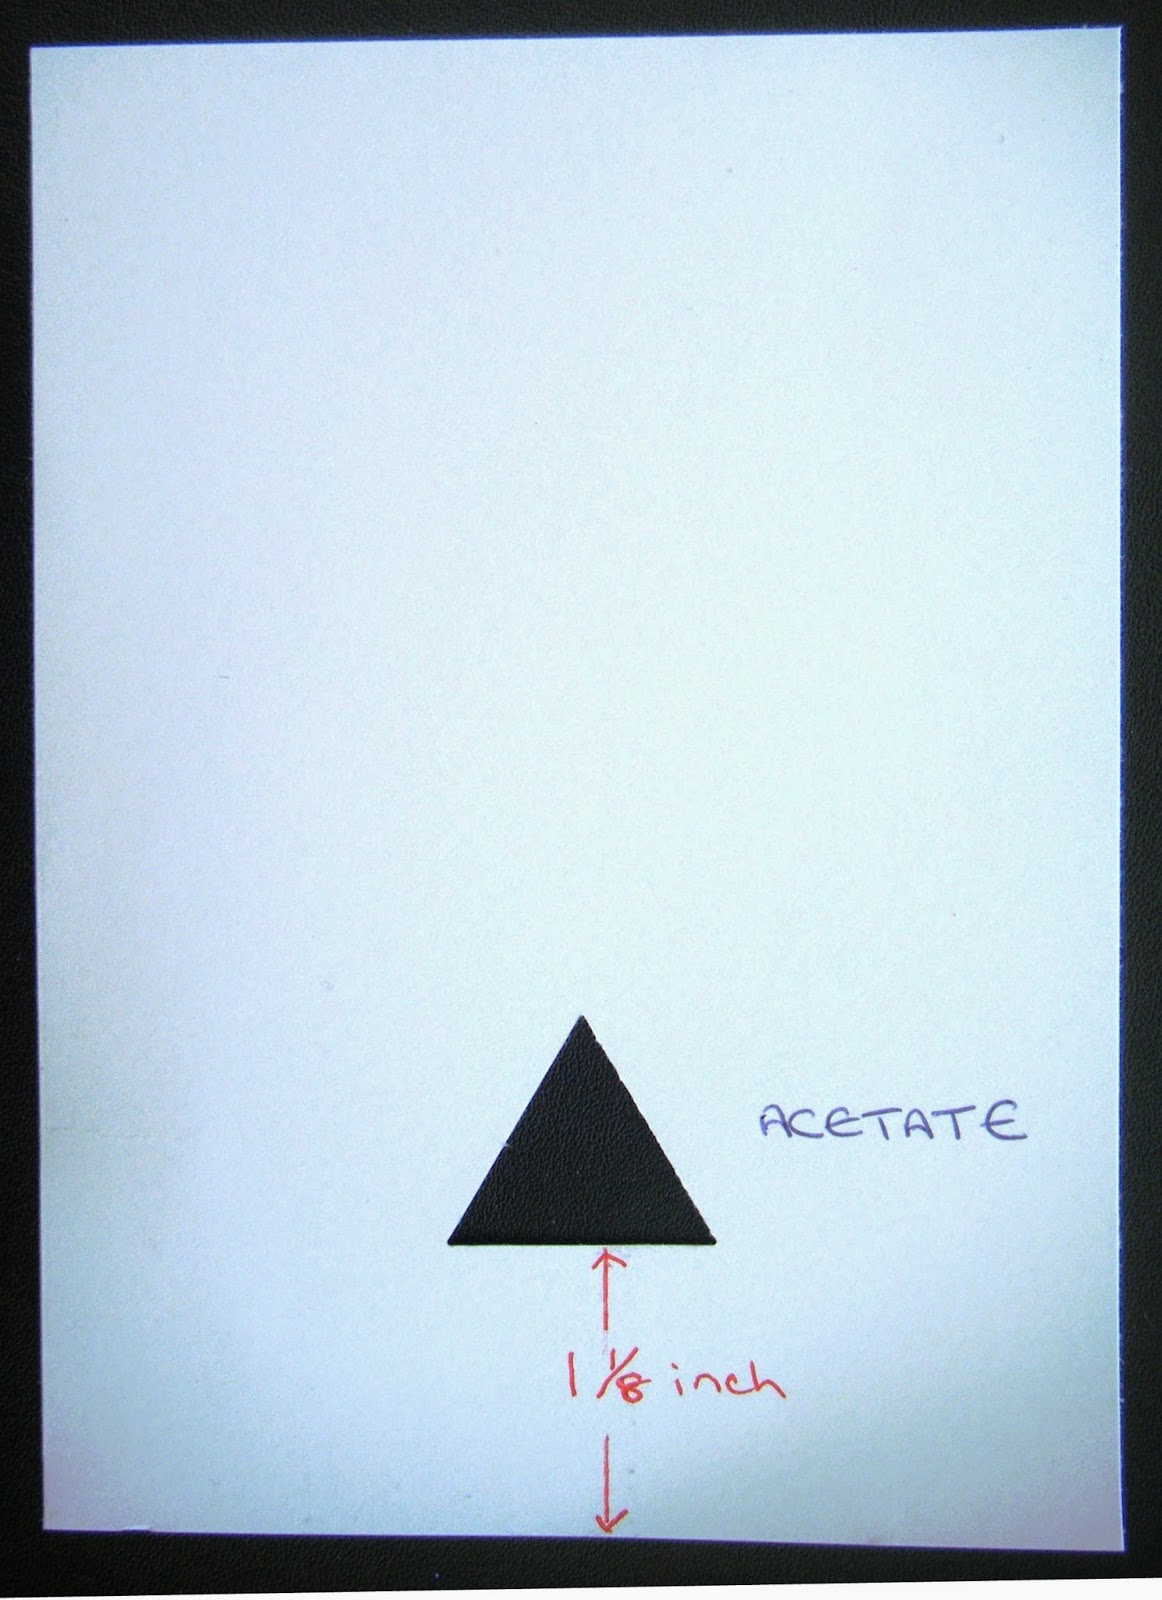
First of all, punch your triangle from the bottom of the narrow side of your acetate
 |
Check the measurement of how far up the acetate it punches - I measured it at 1.1/8 inches
Double this measurement i.e. 1.1/8 x 2 = 2.1/4" then cut the acetate at this depth
(Keep the spare piece of acetate to one side - you will use this to make your template a workable size.)
You will end up with a piece like this
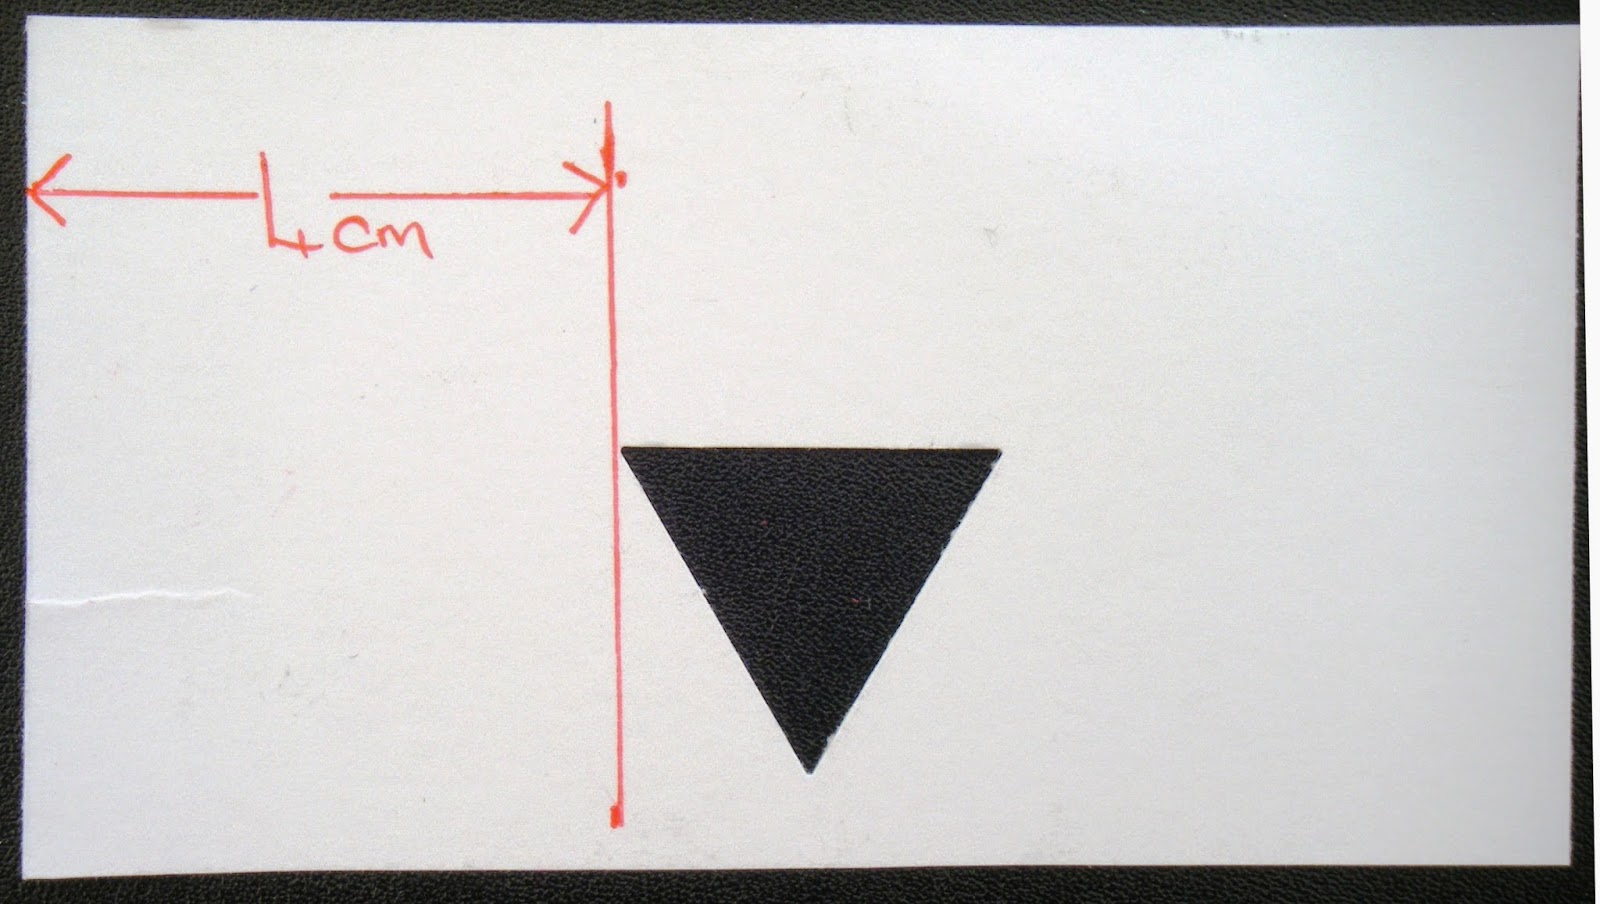
Rotate this piece through 180 degrees (your triangle will now be upside down)
and measure the distance between the LH corner of the triangle and the side - mark a line at this distance.
This will be your visual guide as to where to place the triangle punch the second time.
If you have got it spot on (it took me about three goes to get it right!!)
you should then have your diamond shape punched out of the acetate.
Now retrieve your other piece of acetate and cut it in half.
Place one piece above and one piece below your punched diamond piece.
Sellotape them together as shown below.
Your finished stencil should look like this (I know its not very clear, but see next picture.)
Here I have sponged round the edge of the acetate and onto the cut out diamond
to make it show up a bit clearer.
I wrote "this side up" because I had stuck the sellotape on the reverse side of the acetate-
that way you can clean your stencil without damaging it.
And there you have it - a ready to go diamond shape stencil.
I would like someone to test out these instructions for me and let me know if they are clear enough,
or whether I have missed something out.
If you test this, could you email me and let me know?
katemartin@sky.com
Enjoy!!


Thank you for the instructions Kate, very much appreciated.
ReplyDeleteHugs
Linda xxx
Such a useful tutorial Kate. Thank you.
ReplyDeletexx
thank you Kate that s so generous hugs Judith x
ReplyDeleteAh! A clever way to create your stencil Kate, thanks for sharing x
ReplyDeleteThanks Kate another project to add to the list they really did look super x x x
ReplyDeleteThank you for sharing Kate, really is very kind of you. I hope you had a nice time at the weekend x
ReplyDeleteThanks for the tutorial! Hope you had a wonderful time.
ReplyDeleteA great tutorial Kate, thank you for taking the time to show us how it is done.
ReplyDeleteJanet xxx
Brilliant tutorial Kate.... You are about to see diamonds in my work. I now have " mine" all prettily taped up with flowery Washi tape..... Worked perfect first time round... Does that make me a girlie swot.... Again!! Thank you so much for posting this tutorial....
ReplyDeleteYou are so welcome Amanda - and thanks so much for testing it out for me.
DeleteYes - I think you are a girlie swot - but in the nicest possible way!!
xx
Thank you for the instructions. If I can't find my diamond template I will copy this one. love Ann x x
ReplyDelete