Friday 30 November 2012

Variation on a theme

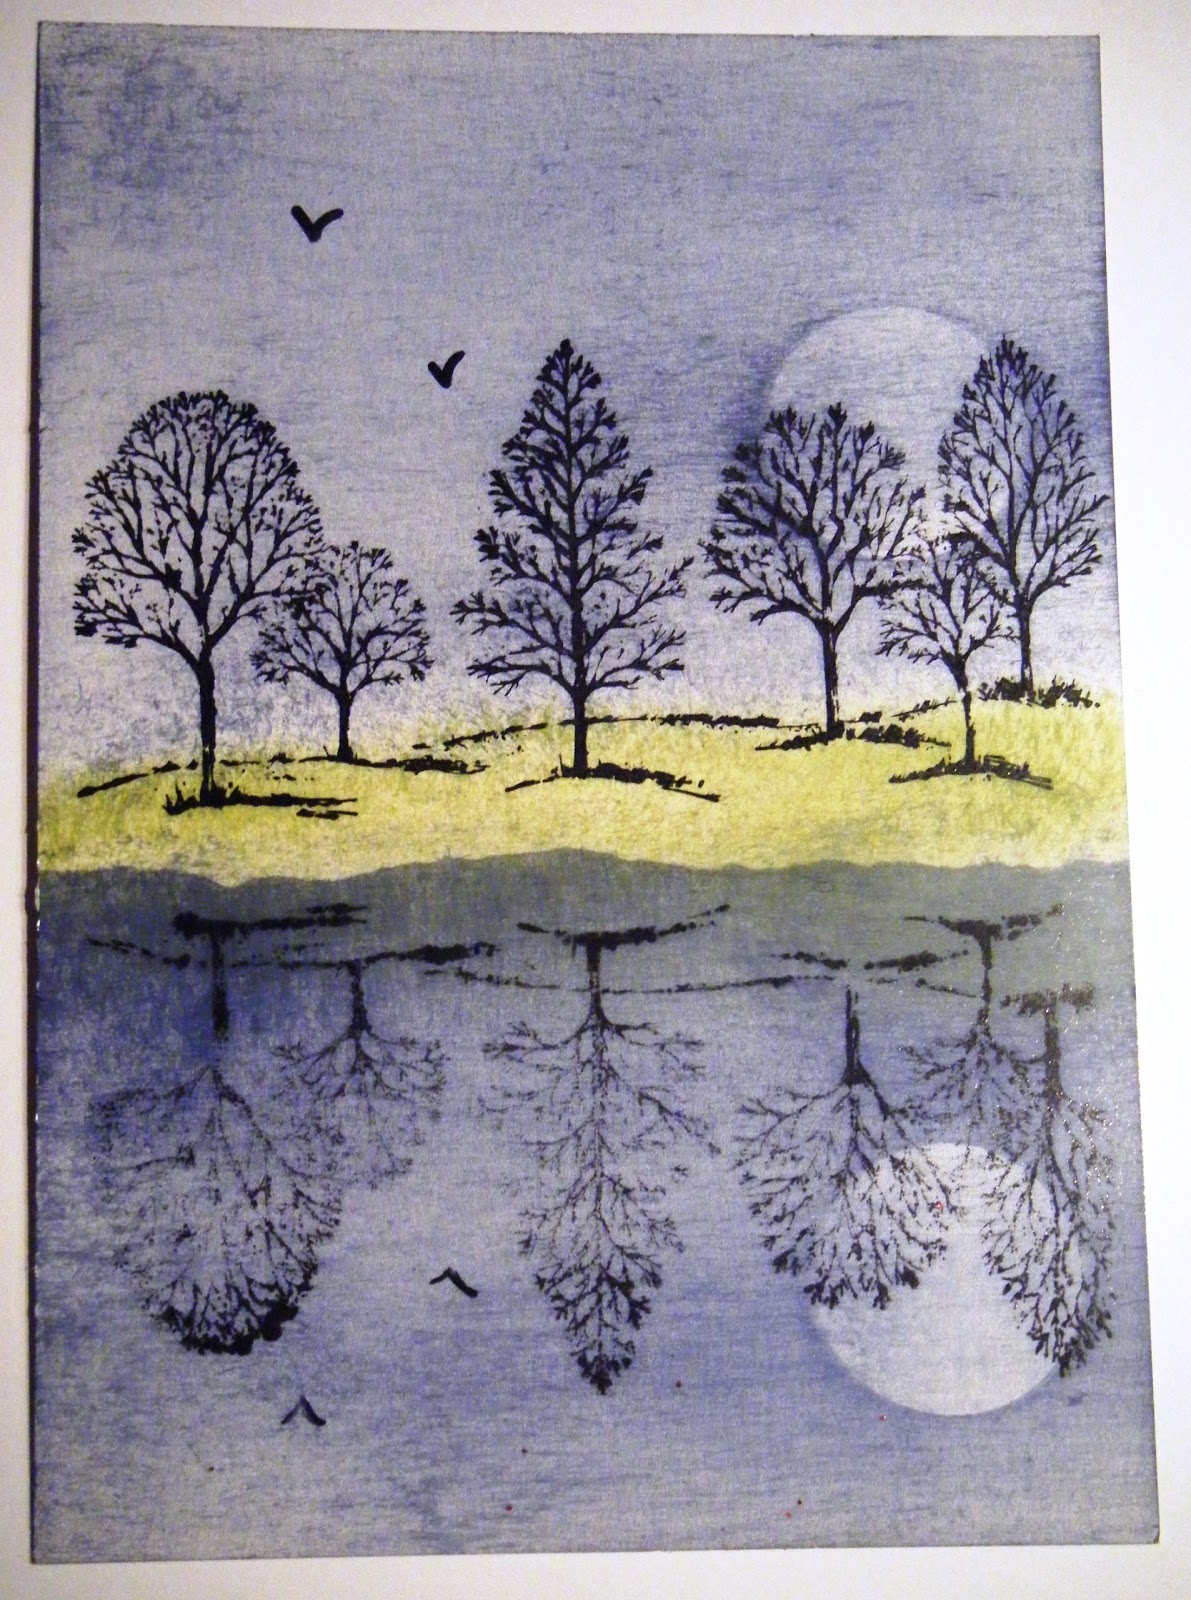
Here's my  birthday version of the same card using the Papaya Collage set again.


The colour combo this time is Pretty in Pink, Soft Suede and Crumb Cake, 
with a touch of Old Olive for the leaves

Thursday 29 November 2012

Chris's Christmas card

Went to Chris's (sis-in-law's) yesterday, and showed her my Papaya Collage card.  
Chris decided that she would like to try a Christmas card using the same set,
Here's the result


Colour combo is Cherry Cobbler. Lucky Limeade and Chocolate Chip
I think it looks quite Christmassy, even though it's not a Christmas stamp set!
Well done Chris!

Wednesday 28 November 2012

Maggie's retiring!!

Today is my lil sister Maggie's last day at work.  I hasten to add that she is retiring early,
as she is 5 years younger than me- and she would kill me if I didn't mention that!
We are all going out for a Chinese meal tomorrow evening to celebrate.
Here is the card that I have made for her.


I have used a different colour combination and style to my usual ones.
I have used Soft Suede, Crumb Cake and Baja Breeze on Whisper White.
The Stamp Sets used are Papaya Collage and En Francais.
The Sentiment is from Teeny Tiny Wishes.
The photograph really doesn't do the card justice, but I am sure you can get the effect!

Here's wishing you a long and happy retirement Maggie!!
Love ya!

Tuesday 27 November 2012

Evelyn's birthday

Today is Evelyn's birthday - (another one of Julies' Jems team) - my SU sister.
We have such a big family now!!
Here's the card that I have made for her.


I have used one of the stamp sets that we received FREE at Convention - Summer Silhouettes
I have used the newest In Colours on this card :- Gumball Green, Summer Starfruit and
Primrose Petals.  The sentiment is from Curly cute and the ribbon is 3/8"Stitched Satin in Gumball Green.
Happy Birthday Evelyn!!  Have a great day.

Monday 26 November 2012

A little something for Anna

Today I have posted a little something to one of my downlines - Anna, it is something that I bought from memento Mall at Convention.  With not being too well, I had completely forgotten about it, so I hope that Anna will forgive me for taking this long to send it off to her.
Here is the card that I have made to accompany the little gift.


The bird and leaf are from Betsy's Blossoms stamp set.  
The wing is stamped again then decoupaged on top of original.  The background on the Midnight Muse
 layer is done using Betsy's Blooms wheel. The sentiment is from My Friend stamp set.
Colour Combo is Midnight Muse, Gumball Green and Whisper White.
The ribbon is the 3/8" Stitched Satin ribbon in Gumball Green.
Enjoy Anna!!

Sunday 25 November 2012

New home card

As you know, baby sis has been in the process of moving house.  Yesterday, she managed to get
everything moved from the old house to the new one, so today I have taken her shopping for paint etc,
 then went home to make her this card.
I have used the Neighbourhood Wheel which is sadly retired, 
but I won't part with it as it is so useful for New Home cards.


Don't look too closely as my colouring in as it leaves a lot to be desired - 
nonetheless I do like this card and I am sure that they will like it too.

Saturday 24 November 2012

Twinchie - two colours

I missed the opportunity of entering the last Twinchie challenge (or perhaps even two!)
as I was busy making swaps for Convention, then when I got home I have been under
the weather with this hacking cough that has persisted now that the cold/flu symptoms have gone.
So this afternoon I thought that I would make one for the latest challenge.


Now I know that this looks like black and white, but it's actually Early Espresso and Very Vanilla.
The stamp set used is Betsy's blossoms, the background and the blossoms have all been embossed.
The leaves have been punched using the Bird Builder punch.
Finishing touches are the flower centres which are tiny Basic Pearls.
I would like to enter this in
Show Us Your Twinchies Challenge#10 - Use two colours

Friday 23 November 2012

Reflection technique

At my Saturday morning monthly workshop this month I showed the ladies the reflection technique.
Several of the ladies had asked how it was done.
The way that I do it is by using Stazon ink on acetate and transferring the image,
in reverse below the original stamping, making the "mirror image.

I think that it works quite well and was pleased with the finished result-
what do you think??


Thursday 22 November 2012

Princess's castle

As promised yesterday, here is the inside of yesterday's card.
Its a pop-up castle for the princess!
I am really pleased with this and I think that Eva Lily will love it!!


If you would like the instructions for this beautiful card they are available  from


Wednesday 21 November 2012

Eva's birthday.

Chris (sis-in-law) has been over today for our crafting get-together and boy have we been busy.
Only one coffee break and a quick break for lunch!!
Chris has been making a card for her Grand-daughter Eva Lily who will be 2 on the 30th 
whilst I have been making the same card for my Great Niece (Sister Maggie's Grand-daughter)
who is also called Eva Lily and who is 2 on the 29th!!
We couldn't believe the coincidence when they were born a day apart and to be given the same names -
what are the chances of that??
Anyway - here is the outside of my card.


I can't decide whether to personalise it and put a 2 on it at the moment -
I think that it's busy enough.  What do you think?
Chris and I have thoroughly enjoyed making this card -
it's all punch art, although some bits are cut free hand.
We used a pattern from the internet and I will pop back later and put a link in here
 to the place where you can buy the pattern from, if you wish to have a go yourself.

Come back tomorrow, and I may just have finished the inside by then,
so you will be able to see what that looks like - it's certainly worth a return visit, believe me!

Tuesday 20 November 2012

Sympathy card for Dale

My baby Sis's partner, Dale, lost his Mum at the weekend and  I have been kept busy trying to help them
 as they are also in the process of moving house.  
(There's never a good time for anything stressful to happen is there!)
 Today was the first opportunity that I had to make a sympathy card for him and his family, and here it is.


A very CAS card - colour combo Basic Gray and Whisper White.
A circular stencil was cut in a sheet of acetate and the shape was ink dusted in Basic Gray Ink.
The branch was then stamped in the circle in Basic Grey as was the sentiment -
 both from the Hopeful Thoughts stamp set.
A tiny pearl was then stuck in the centre of each little flower.

Monday 19 November 2012

More Altered Dictionary Pages

Have been busy golfing with Barry and our friend Alan earlier today, then when baby sis 
(Anne-Marie) finished work this evening, 
I have been over to hers, to help move some of her furniture and a carpet or two!!
All I have had time to do since is a couple of Altered Art Dictionary pages.


Penguin

Reindeer
Hope that you like them!!

Sunday 18 November 2012

Paper Bauble Tutorial

As promised here are the instructions for making the paper bauble.
You will need:
Bakers Twine
2 small brads
Snowflake or other paper ornament to hang in the centre of the bauble.
2 scraps of double sided patterned paper (min size 6cm wide x approx 15cm length)


Cut each 6cm wide piece into 4 strips each measuring 1.5 cm .


Place the strips on top of each other, alternating the patterns.
Make a hole at the top and bottom of the strips.
insert a brad into one end .


Thread the ornament /snowflake onto the Bakers Twine, 


then thread 
both ends of the twine through the other hole.
(Make sure that the thread isn't too long - you want your ornament to dangle inside the bauble!)


Insert the brad through the centre point of your length of ribbon, then through the hole and fasten.


Tie the ribbon into a bow, then fan out each strip until you get your bauble shape.
Make sure that you have the ornament on the INSIDE of your bauble when you start to fan it out
- it doesn't look right on the outside!!


There you have it - baubles at minimum cost from scraps of DSP! 

Saturday 17 November 2012

Paper Bauble

Would you believe that something as simple as this .........


could turn into something as beautiful as this?


With just a few twists and turns!!

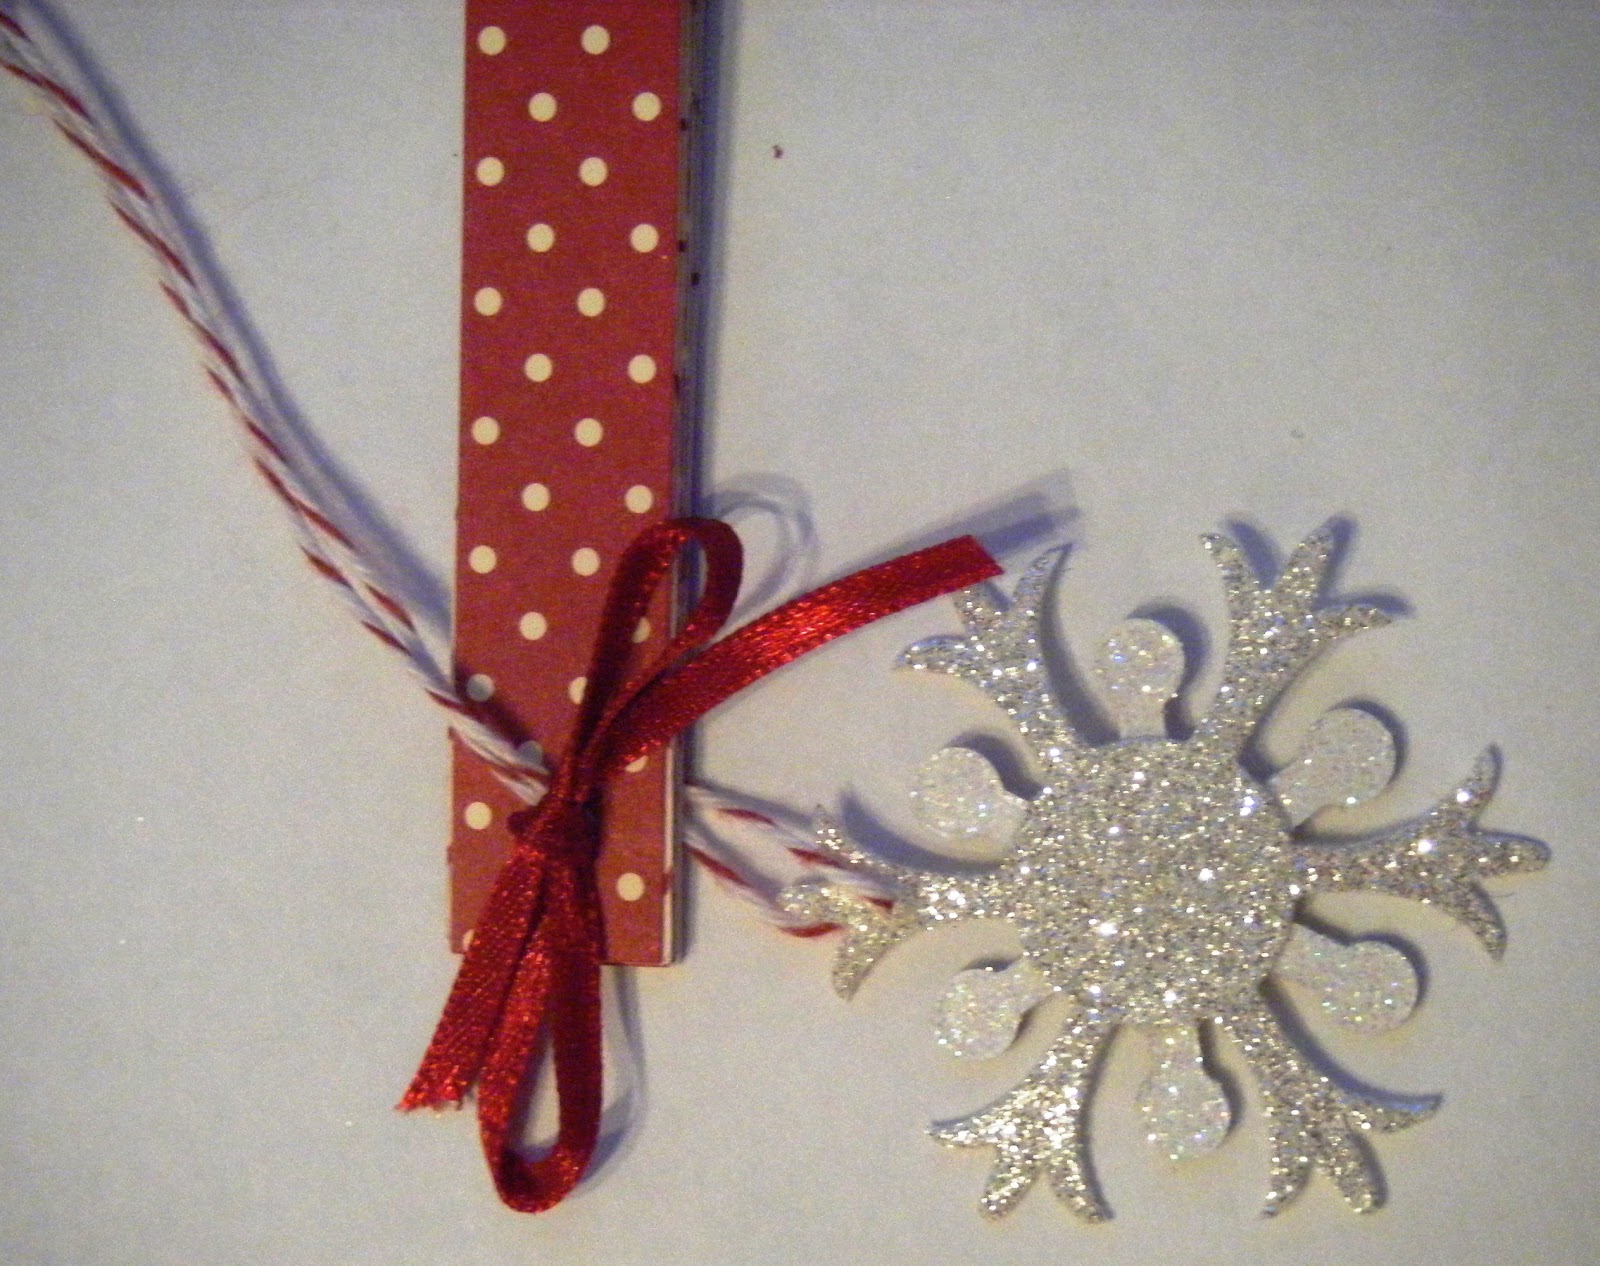
Close up of snowflake in centre of bauble.

Believe it or not this was made with oddments of retired Christmas DSP,
Bakers Twine, the Bigz Snowflake Flurry Die and some Dazzling diamonds and Glimmer paper
-Oh - and a couple of brads and a small piece of ribbon.
If you fancy a quick tutorial, Let me know and  I'll come back tomorrow
and do a short and sweet version of how to make it!!

Friday 16 November 2012

Papaya Collage

Today I have been over to Chris's (sis-in-law) and was joined by Anita and Cheryl later and we did some communal crafting.  Here's my version of the card  we made.  When Chris posts hers on her blog, I will put a link here for you to see hers too


Colour Combo - Pink Pirouette, Soft Suede, Chocolate Chip and Crumb Cake.
Stamp sets French Foliage and  Papaya Collage.

Thursday 15 November 2012

Snow Flurry Tag

Here's a card inspired by a tag that I received at Convention
and here's a link to the originator of the tag


Colour Combo - Night of Navy, Bashful Blue and Whisper White.
Two Tags Bigz Die used for tag shape in BB card.
Strip of NoN embossed using the Lacy Brocade Embossing folder.
Snowflake cut using the Snow Flurry die, then glittered with dazzling diamonds.
Sentiment from  Joyous Celebrations.
Love these colours!!


Wednesday 14 November 2012

Ornament keepsake bauble v2

Version 2 of this bauble card here


Colour combo - Indigo Island, Cherry Cobbler and Very Vanilla
Festival of Prints DSP
The original was received from Cheryl as our October Training swap

Tuesday 13 November 2012

Santa place setting

Today my ladies have all made a few Santa place settings each.
They reallly enjoyed making these cheerful Santas.
The design is cased from a swap that I received at Convention
made by  Nicole Brinkrode


I have modified it slightly to use the SU Scallop Circle Bigz Die
The body and hat are made from a folded red napkin.
The eyes and nose are punched using the Owl Builder punch
and the moustache is punched using the wing from the Bird Builder punch.
The specs are drawn using gold and black pens.
Thanks for the inspiration Nicole!

Monday 12 November 2012

Jolly Jingles

Here's a very simple card made using the Jolly Jingles Wheel.


Colour Combo is Very Vanilla, Cherry Cobbler and Old Olive 
with Gold Embossing Powder and Gold Glimmer paper.
Have to get a few of these quick cards rolled out in order to get all my cards
 done in time for this Christmas!!


Sunday 11 November 2012

Desk Calendar

Another quick post this evening - here's a desk calendar that I have made earlier today.
I like to do projects that my Crafting ladies can make to sell for their fundraising
and here's a pretty quick make.


You can make 3 of these from one sheet of A4 card so it's quite economical.
The background was embossed with the Fancy Fan Embossing Folder.
The Calendar block was matted onto a rectangle of Midnight Muse Card stock.
The flowers were punched with the Boho Blossoms and Itty Bitty punches
wit Midnight Muse and Silver Glimmer paper.
 The leaves were punched in Midnight Muse with the Bird Builder punch

Saturday 10 November 2012

Champagne glass glitter bauble


A quick card that I made yesterday using the bauble punch, Early Espresso card stock,
 Champagne glass glitter and Crystal Effects. 


 I used the Northern Flurry embossing folder for the background.
I punched a couple of leaves in gold card using the Bird builder punch.
Put them all together and stamped the sentiment from Teeny tiny wishes and there you
 have it - a really quick and easy Christmas card. 
 (You just have to wait for the Crystal effects to dry though before you try to assemble it!!

Friday 9 November 2012

Baby Sis's birthday

Today is also the birthday of my Baby Sis - Anne-Marie.
I went over to see her this afternoon and took her her pressie and this card.


Colour combination is Very Vanilla and Calypso Coral with Natural Composition DSP.
The same butterfly (from Papillon Potpourri) was stamped across the corners and onto Very Vanilla card stock with CC ink, then punched out with the Elegant Butterfly punch.
Tiny pearls were stuck onto the centre 3 butterflies for their heads and bodies!
Happy Birthday Baby Sis!!

Thursday 8 November 2012

Lexie's birthday

Tomorrow is my beautiful Grand-daughter Lexie's birthday and she will be 6 (going on 60) years old.
She doesn't know it, but in the morning she will be going with her brother Lucas 
and her Mum and Dad to Euro Disney!! What a fabulous surprise for her.
I have been down this evening to take her present and had to pretend that I couldn't see
her tomorrow because I am going out!!  She can't open the present until the morning!!
Anyhow here is the card that I have made for her


The base card is Regal Rose with a layered piece of Patio Party DSP.
The sentiment is die cut using a (now retired) SU set with the
fabulous red Glimmer paper.
Happy birthday Lexie darling!!

Wednesday 7 November 2012

Inspiration

Well I am still not 100% fit yet and still feeling quite sickly, couldn't decide what I wanted to do, 
so decided to look through my Convention swaps.
  I came upon this little box of tea lights.


This inspired me to have a go at making one of these for myself.
Here's my take on it.


I simply used Real Red card to make a Pizza box, 
punched the top with the Decorative Label punch,
and added the ribbon with the Julie bow across the corner.
Behind the window I stuck a piece of the luxurious red flocked acetate 
from the Candlelight Christmas Speciality DSP.


To tidy up the inside of the lid, I cut a card square and punched out the frame
 then stuck it on the inside of the top.
Love it!
I can't give credit to the lady who swapped with me, as there is no name on the original box,
but I do thank her for the idea as I have so enjoyed making this.

I would like to enter this in
Artistic Inspirations Challenge #14 - Anything goes
http://artisticinspirationscrafts.blogspot.ie/

Tuesday 6 November 2012

Prize Patrol

At Convention everyone has the opportunity to win Stampin' Up goodies in the Prize Patrol.
We were all given wrist bands of different colours and patterns.  When a prize patrol
was announced - you simply checked your wristband and if it matched, you had to jump up
 and down and wave your arms in the air to show that you were a winner and your prize
 was then delivered to you by a member of staff from Stampin' Up.
I was lucky enough to win this!!


There was the new Essentials Paper-Piercing Pack (worth £7.25)
The new Paper-Piercing tool (worth £3.50)
and the fabulous Papilon Potpourri stamp set (worth £13.95)
A total of nearly £25 worth of goodies - woo hoo!!
And all wrapped up lovely and with ribbon too!!
I will now be able to re-create the cards that I made at our Quarterly training
last month, using this set.  Here's another of the cards that we made on the day.


Wasn't I so lucky!!

Monday 5 November 2012

Team gifts

Well I still have the streaming cold, so I have just taken a few pics 
of some of the Team gifts that I received at Convention.

Key ring

Scissors pouch

Coaster

Tea bag  wallet

Tile necklace

Come back tomorrow and I'll post a few more.


Sunday 4 November 2012

Home from Convention !

Hello everyone - I am now back from a fabulous trip to Mainz, Germany,
where I have spent the last three days in the company of a wonderful group of people
at the Stampin Up 2012 European Convention.


There were ten of us attended from the Stampin Up team that I belong to - Julies Jems,
and we have had a fantastic time together with  demonstrators from Germany France and the UK.
(700 of us in total)
 I have lots of superb things to share with you, however, since getting home 
just after midnight, I have developed a streaming cold and am feeling thoroughly miserable,
Consequently I  am afraid that you will have to wait to see all the goodies and
hear all the news that I have brought back with me. 

One piece of exciting news that I can share with you before I get back off to my sickbed is
that next year's Convention will be held in MANCHESTER!!!  Woo woo!!

Saturday 3 November 2012

Jems' gifts revealed!


Here are the bag charms that I made for the Jems
(and there's my own 3rd from left)


Did you notice the sentiment on the tags (yesterdays posting)
it read "A gem for a Jem"
Cheesy or what!!

I will be travelling back home tonight, so tomorrow I will post some Convention piccies for you.

Friday 2 November 2012

Jems' gifts

Another thing that we do at Convention is to exchange gifts with our team - Julie's Jems.


There are ten of us in all so I have made 9 gifts.

Team gifts
 Another rubbish photo - but the colour combo is Ivory and Early Espresso .
The card stock was cut using the Pillow Box die,
then run through the Elegant Lines Embossing Folder.
(You may just be able to see the embossing in the top picture)
I did computer generated sentiments and punched out with the Jewelry tag.
Finished off by fastening with a Ivory or Early Espresso ribbon.
If you would like to see what's inside - pop back tomorrow
when they have all received their gifts.

Thursday 1 November 2012

Julie's gift - revealed!

Ta da!!


A lovely twinkling shamballah bracelet!
(wish my photo's would come out better!)
Honest it does twinkle!!

Julies Roomie Gift

This is a scheduled post, as by the time this is published I will be on my way to Germany.
It's Convention etiquette to give a gift to your roomie (the person you share a room with).
This year I am sharing with Julie - who just happens to be my Stampin' Up mummy
(which is a bit of a laugh as I am old enough to be her Mum!!)
Anyhow - here it is all wrapped up ready for her to open later today.


If you pop back later on this evening (by which time Julie will have opened her little pressie)
you can see what it was that I gave her.