Monday, 28 July 2014

Black and White with something bright - glitter, glimmer, shimmer or bling!!

It's WWWU time again - but with a difference.
Julie Wade who normally comes up with the challenges is on holiday, 
so I was asked if I would do it - so here it is.

WWWU Challenge #29
Black and White with something bright - glitter,  glimmer, shimmer or bling!!

and here's my projects.


Dazzling Diamonds Glimmer paper used for bottom flower and centre, Silver Bakers Twine used for fastener/


Dazzling Diamonds and Silver Glimmer paper (plus white) used  for punched trees.
Stamp and stick used on sentiment with Dazzling Diamonds glitter


Craft white ink sponged over embossed black card - Lovely lace Embossing folder.
Itty Bitty Accents punched Shamrock flowers using Dazzling Diamonds Glimmer paper
and Basic Rhinestones used for flower centres with random placement too.
Silver Satin Ribbon bow.


Saturday, 26 July 2014

Just want to say.... different colourways

Remember my card for no reason that I posted the other day?
I promised to post the two different colour ways that Jean did on Wednesday -
so here they are!!


and here are all three versions together


I shall have to do this again using these colours!!


Friday, 25 July 2014

Sea Street meets Maritime shaker card

Here's another card make from our monthly Jems' training morning.
It's a while since I made a shaker card so I really enjoyed making this!


The colour combo is Real Red, Coastal Cabana, Night of Navy and White - very nautical!
The Maritime DSP was used for the fishy background of the shaker unit and the pennant behind it.
 The Crab, Lobster and Anchor and the starfish on the red card  were stamped
 with the Sea Street stamp set.
Silver Glimmer paper was punched with the Itty Bitty star punch and 
the stars and gold sequins were used to give the shaker effect.
Thanks Julie for this great design!!


Thursday, 24 July 2014

Christmas Door Wreath

I have just done a new version of an old card, bringing it up to date using new stamps and punches.


The door is stamped with Crumb Cake ink on Crumb Cake card stock using the Hardwood stamp
and matted onto a Very Vanilla base card.
The wreath is made using the leaves from the Bird Builder punch and Old Olive C/S,
 and the flowers are cut with the shamrock from the Itty Bitty Accents Punch Pack and Real Red C/S.
The snow is just torn card, with frosted accents using Dazzling Details.
The flower centres are done with Cherry Cobbler Dazzling Details.
I'm quite happy with this updated version of an old favourite -
and that's another Christmas card completed!!


Wednesday, 23 July 2014

Just want to say!

Here's a card that I make a few of, I call them just because cards, 
or as the verse says, no special reason cards.
It's nice to know that someone cares enough just to send you a card sometimes!


A very CAS card, colour combo Lost Lagoon and White.
Textured Impressions Delicate Designs embossing folder, and
Textured Impressions Perfect Polka Dots Embossing Folder,
were used for the two embossed panels.
The verse was computer generated then cut using one of the
 Labels Collection Framelits Dies, as was the mat underneath.
The little shamrock style flowers are from the Pictogram Punches stamp set,
cut with the Itty Bitty Accents Punch pack.
I really like this card!
One of my crafting ladies has made this in two different colourways - I'll post these later!


Tuesday, 22 July 2014

Moonlight Sunburst!!

Here's the other card that I made at Chris's the other week.
It's a sunburst card, and it was a little bit faffy, but well worth the effort.


The colour combo is Smoky Slate. Hello Honey and Lost Lagoon -
I do so like these colours together with the white!
The papers are from the Moonlight DSP stack.
Flowers punched using the Pansy punch, the 1.1/4" Circle Scallop punch
and the tiny shamrock from the Itty Bitty Accents Punch pack.
The ribbon is Hello Honey 3/8" Stitched Satin Ribbon.
Tiny brads form the flower centres.
What do you reckon??

Monday, 21 July 2014

Traveller

Chris (sis-in-law) came over today for a much needed crafting session - we had both lost our mojo,
 for one reason or another, so it was good to get together and get some serious crafting done together.
The first card that we made was cased from a swap that I received, at our latest all day training
 the other Saturday. The original was made by fellow Jem - Rebecca Deary.

My card

Chris's card
As you can see, we chose different colours for our respective cards, but I think that both of them 
look really good. I used Crumb Cake and Very Vanilla card stock and Crumb Cake ink.
Chris used Crumb Cake, Chocolate Chip and Very Vanilla card
and Crumb Cake, Soft Suede and Chocolate Chip Ink.
The stamp set is the new "Traveller" set.
Thanks for the inspiration Rebecca - just what we needed!!

Saturday, 19 July 2014

Box Arm Card

It's over a week since I got together with Chris (sis-in-law) to craft together,
and we made two beautiful cards. I have been playing golf quite often this week!
This week (when I didn't see her) I cased her card and came up with this one.

Front view

View from below


View from Above

It's not as complicated to make as it looks I might add, but I really enjoyed making this.
The Colour combos is Cherry Cobbler, Very Vanilla and Gold Glimmer,
with a touch of Baked Brown Sugar, Old Olive and Crumb Cake on the DSP
Season of Style, which is now retired, but as we are waiting for the 
Autumn Winter Seasonal Catalogue to arrive (28th August) there are no Christmas papers
available at the moment.
The larger bauble was cut out with one of the Holiday Ornament framelits in Glimmer paper
and the tiny baubles were punched using the Merry Minis punch pack
(both of these are available until the 27th August!)
The sentiments are from More merry Messages, and the ribbon is from my stash.
I really love this card and am going to do it in another colourway!
Thanks for the inspiration Chris!!

Monday, 14 July 2014

New Annual Catalogue launch


Well it's here at last!  The launch of the new Annual catalogue, packed full of goodies, some old , some new,
but plenty for everyone. To view the catalogue, simply click on the picture of the catalogue in the side bar.
Grab yourself a coffee, put your feet up and browse away!!

Fun Frames

One of my favourite embossing folders in the new catalogue is the Fun Frames set
Here is one of the two in the set.

front view


side view.
The colour combo is Lost Lagoon, Hello Honey and White.
The paper used is from the All Abloom DSP stack.
Hello Honey 3/8" stitched Satin Ribbon  forms the brake for this easel card.
Sentiment from Teeny Tiny wishes , punched with Word Window punch,
Layered on a punched Hello Honey Modern Label.
I do so love this paper!!

Sunday, 13 July 2014

Hayden's Christening

Today is the day that my Great nephew is being Christened, we are off to the church shortly,
 so thought I had better post this before we get off.
Her is the card that I have made for him.


The colour combo is simply Pool Party and White
The cross was made by cutting away parts of the Lattice Bigz die (now retired).
Very simple embellishments of ribbon and Basic Rhinestones.
Very clean and simple, but I think very effective.
Here's wishing Hayden a long and happy life.!

Saturday, 12 July 2014

My very first attempt at Project Life

Today has been our Team (Julies'Jems) Quarterly Training Event.
We have have had a fabulous day, but I have to admit that the highlight of today has been
the making of my very first Project Life pages.
Here are both sides of the very first ever attempt at this nerve wracking experience!!

Front

Reverse
I have to admit that I am not a scrap booker!  (Some of you already know this!)
Apart from the page that I did for a display at Telford last year
of my Neice/God-daughter's Wedding Day, I have shied away from scrapbooking - despite owning several scrapbook kits that lay pristine in their original packaging.
This morning, the lovely Caroline talked to us about scrapbooking and Project Life.
Now I have already bought the Photo Pocket Pages, the Everyday Adventure Card Collection
 and the Accessory Pack, but was at a loss as to where to start. 
But - with some helpful tips from both Caroline and Julie, I was inspired to come up with the double sided page as shown above - and actually started on a second one!!
I'll post that when I finish it - honest.
The subject of this little project is the arrival of Niece's first son in April this year
and his Christening which takes place tomorrow!
Watch this space for updates!!
Thank you once again Caroline and Julie!


Thursday, 10 July 2014

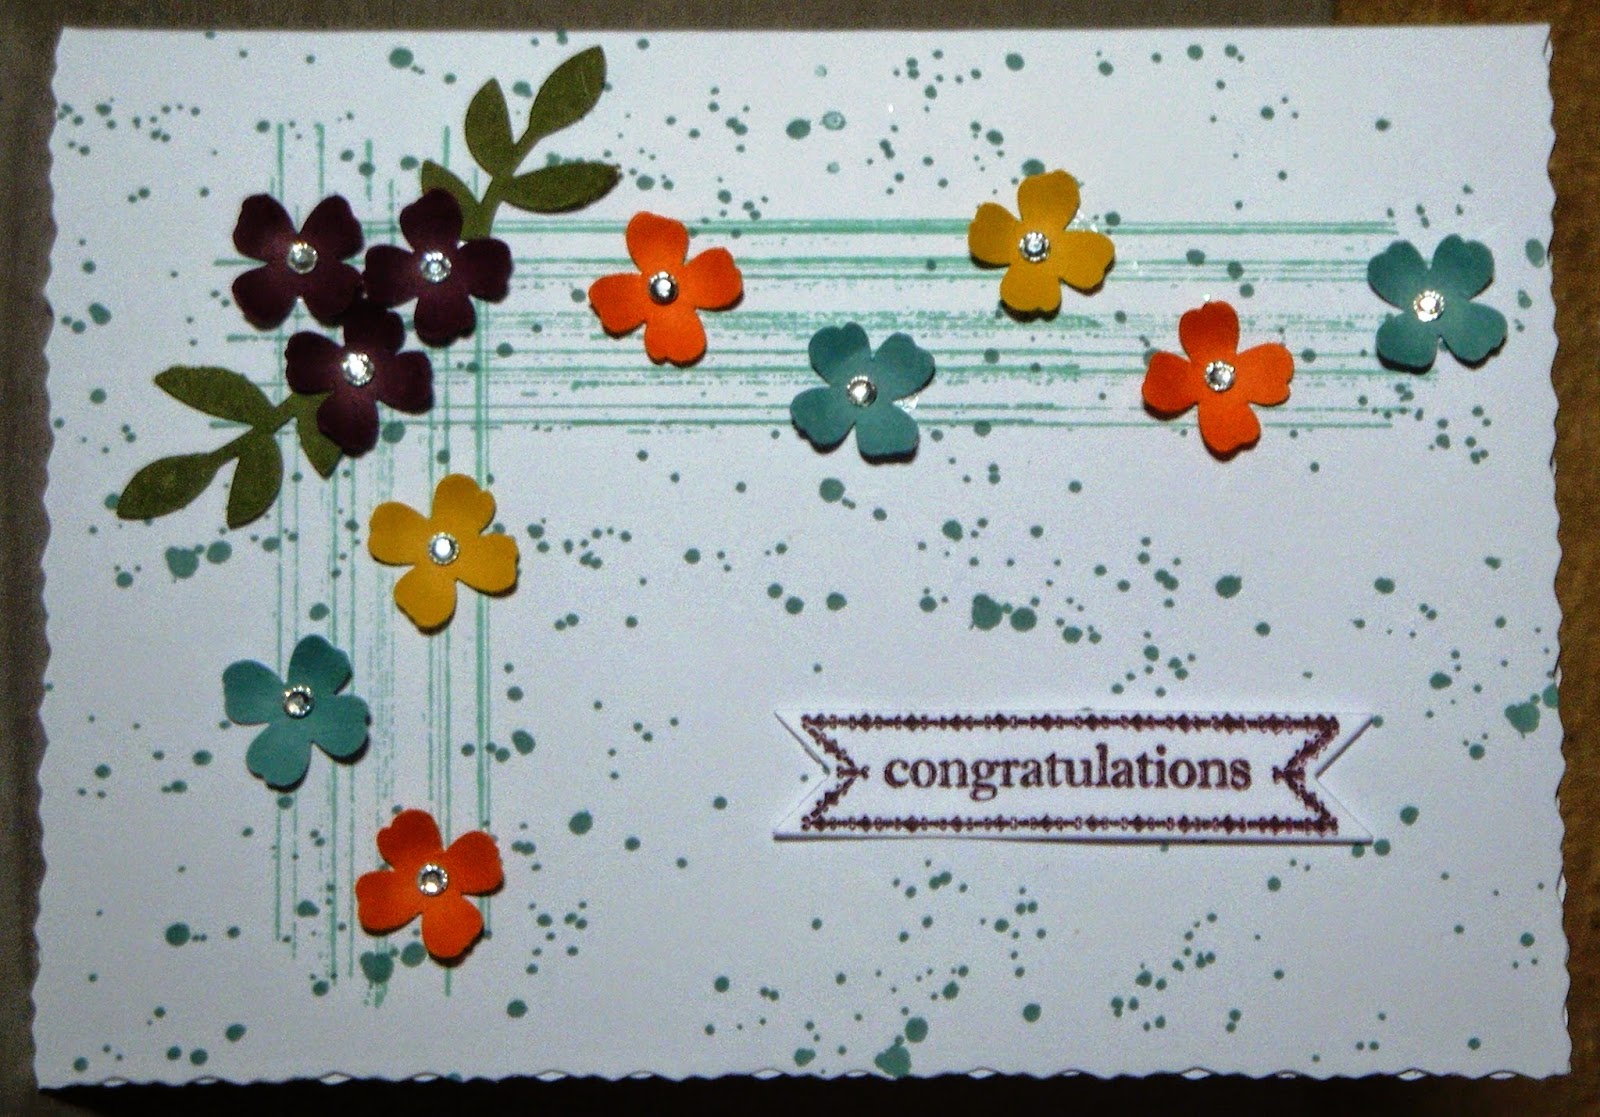
Congratulations

Stampin' Up! are running a July Sales challenge and my newest team member and downline - Cheryl ,
has already achieved this, so I made a congratulations card for her.


One of my firm favourite stamp sets - Gorgeous Grunge is featured here,
along with flowers punched in the newest In-Colours of
Lost Lagoon. Hello Honey, Blackberry Bliss and Tangelo Twist,
using the little shamrock shaped punch from the Itty Bitty Accents Punch Pack.
The leaves are punched with the Bird Builder punch and Mossy Meadow cardstock.
Sentiment from Itty Bitty Banners stamp set and cut with the matching Framelits.
Tiny Basic Rhinestones form the flower centres.
Congratulations Cheryl - well done!

Wednesday, 9 July 2014

Simon's birthday

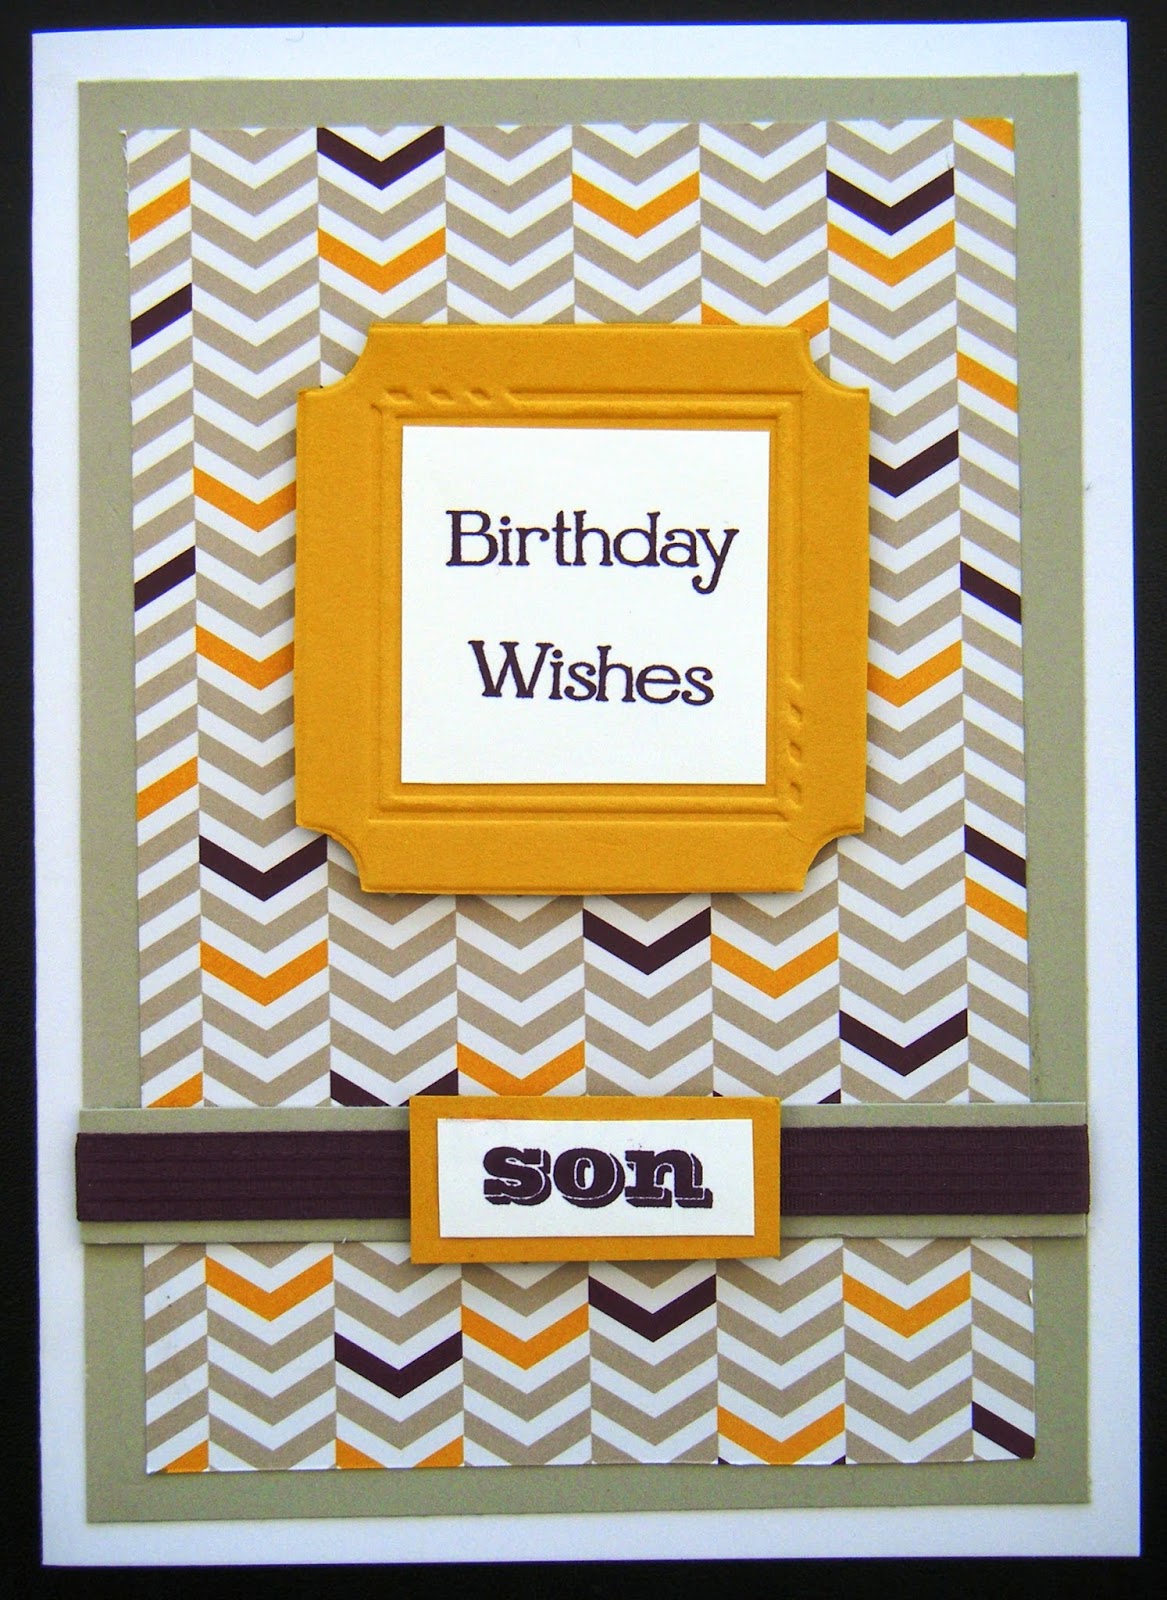
OMG!!  Today is my son's 45th birthday - where has all that time gone??
(Have I mentioned before that I was a child bride??)
Here is the card that I made for him - very CAS - nothing fussy,
hope that the colours are not too feminine.


The background is from the Moonlight Designer Series Pack
the colour combo is Blackberry Bliss, Hello Honey, Smoky Slate and White.
The ribbon is Blackberry Bliss 3/8" Stitched Satin ribbon
the frame is a  Fun Frames Textured Impressions embossing folder,
 which is fussy cut out after embossing and the white card is then stamped on with the greeting 
( from Four You) and cut to fit the frame.
The Son stamp is from a retired set - "For my family" 
- but it is so useful that I won't part with this!
I am quite pleased with this.

Tuesday, 8 July 2014

New In Colours, Work of Art, Thank you's!

Here is a selection of this months thank you cards that I give to customers with their orders.

Lost Lagoon, sentiment from Four You

Hello Honey - sentiment from Four You

Blackberry Bliss - sentiment from teeny Tiny Wishes.

Tangelo Twist - sentiment from Four You

Hello Honey and Mossy Meadow - sentiment from Teeny Tiny Wishes.

All the cards were made using the Work of Art stamp set and the little shamrock is punched with one of the new Itty Bitty Accents Punch Pack. Where there is a central flower featured  this has been
stamped with petite Petals and cut with the matching punch.

The colours are not true to life in these pictures - they look quite dull, 
but in reality they have strong earthy tones.
That said - I am quite pleased with the results!

Saturday, 5 July 2014

Lady Captain's Day

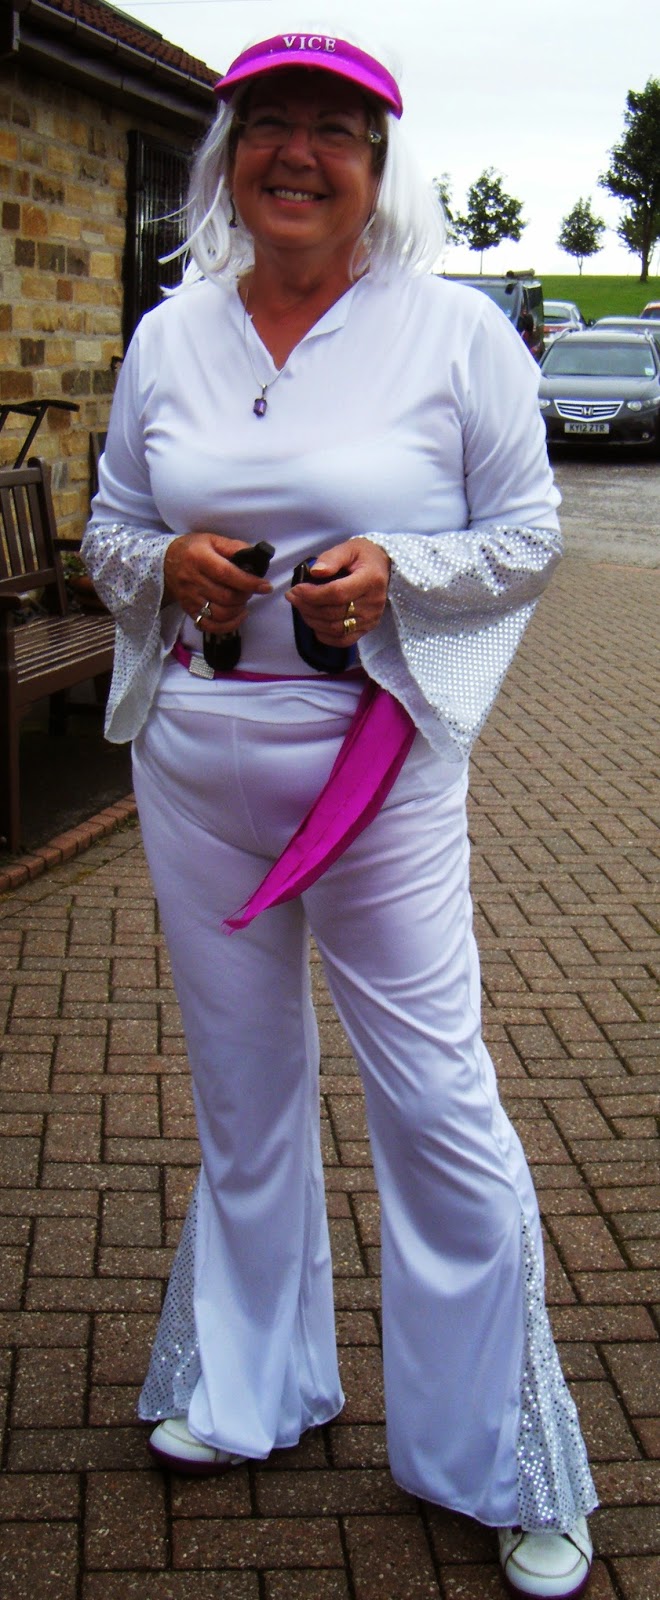
Today is the high spot  of our golfing calendar - it's our Lady Captain's Day,
this is when we all dress up to a theme connected with our Lady Captain -
who this year, is an Abba fan!!
We have had a fabulous day!!
Here are a few photos for your amusement.
Bear in mind that we had to play a round of golf in these clothes!!

Me

Lauren

Jo

Lady Captain (Mandy)

Carol, Val & June

Carol, Val, June and Ann

Glynis (My doubles Partner)

Elaine

Lady Captains buggy

Jude

Lyn, Joan, Olive and Denise

Vice Captain (Chris)

Joan, Glynis and Elizabeth

Rosemary and Hazel


Lady Captain and Lady Vice

Hope that you have enjoyed seeing these!!

Thursday, 3 July 2014

Pop Up Box Card - instructions and sizes.

Quite a few people have asked for the dimensions of the rectangular pop up box -
so here they are.

You only need one sheet of A4 card to make the box, the dividers and you can 
actually punch all your flowers from what's left if you use the same design as me.
With your piece of A5 card Portrait, cut at 10.5 cms and score this piece, again portrait, at 5 cms.
Turn the card sideways, so it is now Landscape and score as follows:
at 10, 14, 24 and 28 cms.
Snip down the 5 cm panels to the score line and cut out the small end piece.
Glue the 5.5 cm panels together to form your box.
To make the dividers - cut  2,   2cm wide pieces of cardstock 12 cms long (from the remaining card)
score each end of these pieces at 1 cm - these are then folded and glued to the side panels of the box.

I have a diagram showing the cutting and folding plan, but it's too dark to get a good picture of it now,
so I'll photograph it tomorrow and add it to this post.

Hope that this was useful.

Wednesday, 2 July 2014

Happy birthday Chris

Today is my Sis-in-law Chris's birthday, normally we spend Wednesday together
crafting at one another's homes, but today Chris is travelling home 
from a weeks holiday in Cornwall so we've not got together today.
Here's the card I have made for her.


It's yet another of these pop up box cards - I am getting quite good at this design!
It doesn't take as long now that I have had some practice!!
The colour combo is Melon Mambo and White.
The paper is Gingham Garden DSP - which has now retired.
The stamp sets are Flower shop, Petite Petals and Petite pairs
and the punches are the matching Petite Petals, and Pansy Punch.
The flower centres are Basic Rhinestones.
Happy Birthday Chris - hope that you are having a great day!!

Tuesday, 1 July 2014

June Training card

Here's a card that we made at our monthly Team Training in June - we used a few items that you will find in the new catalogue, available from today!


Colour combo is Basic Gray, Smoky Slate, Soft Sky, Hello Honey.
The new Lovely Lace Textured Impressions Embossing folder was used on the Soft Sky layer, 
and also on the Smoky Slate scalloped circle and the Hello Honey scalloped circle.
The sentiment is from Something to Say, as is the little flower, which was
cut out with one of the punches from the Itty Bitty Accents Punch Pack.
The Hello Honey ribbon is also new.
Tiny Basic Rhinestones and a White Bakers Twine bow finish it off nicely!